How to setup a 911 Alert using 2Ring Phone Services
2Ring Phone Services Blog Cisco CUCM Phone Services
2Ring PHONE SERVICES is a rich package of services enhancing Cisco Unified Communications Manager (CUCM).
This blog post focuses on alerting, which comes handy when you or any particular personnel group should be notified about a certain event. Click here for an overview of Alerting delivered by 2Ring PHONE SERVICES.
More specifically, by following the steps described below, you can create a simple alert that will send a text message to a pre-defined security group when someone on the network dials 911.
Note: If you do not have 2Ring PHONE SERVICES available, request a free 60-day trial of the ADVANCED Edition at www.2Ring.com/NewJuice.
1.1 Creation of a Security Group
Create a group of numbers and fill it with numbers/contacts to which the alert should be sent. Such a group has to be created manually; however, once you have a group created, it can be filled manually or automatically from MS Active Directory, a database, a csv file, etc. by using 2Ring’s SYNCHRONIZATION Tool. In our fictional scenario, we add contacts manually.
Go to MESSAGING –> Groups of Numbers

The list of existing groups of numbers in 2Ring PHONE SERVICES
Click on Add Number Group.
Enter Name (required) and Description (optional).
Click the Submit button.
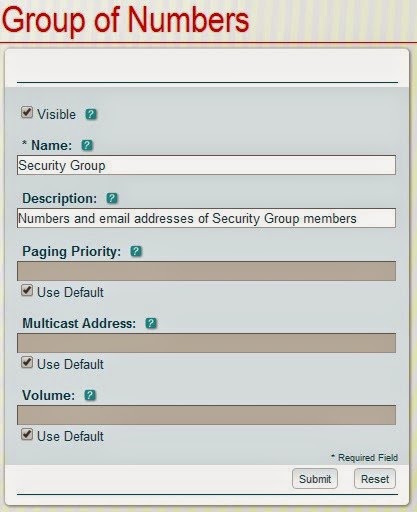
Group of Numbers – Detail / PropertiesClicking the Submit button will take you back to the Groups of Numbers page. To assign numbers to the group that you just created, click the Arrows icon in the Action column (see it below in red).

Arrows Icon
On the next page, at the top, in the Number Types section, check the checkboxes for Extension, Jabber, and Mobile, and also check the Include Emails checkbox lower down the screen.
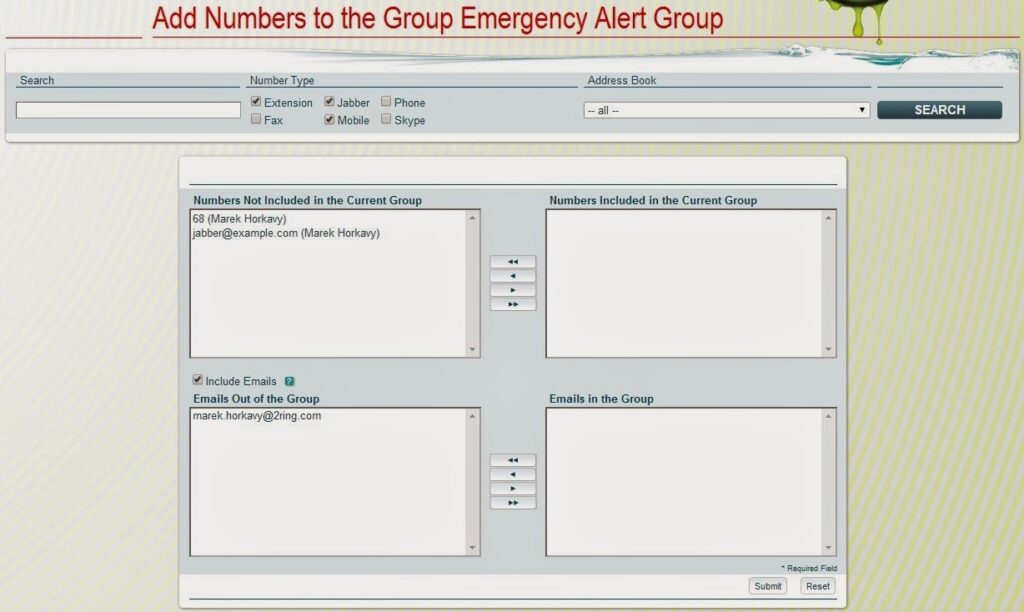
Who should be notified and how?
While holding the Ctrl key, select contacts one by one. When you have selected all the desired numbers, click the ► button to add those contacts to the right column called “Numbers Included in the Current Group.” Repeat the process with email addresses to have those added to the “Emails in the Group” column.
Once everything looks good, click the Submit button.
1.2 Creation of an Alert Template
The next step is the definition of an alert template which is nothing more than a group of actions to be carried out when the alert is called. In our case, we will send 1) a text message to IP phones, 2) a chat message to Jabber Clients, 3) email to Security Group members, and 4) even send an SMS to the same Security Group members.
Go to MONITORING –> Alert Templates.
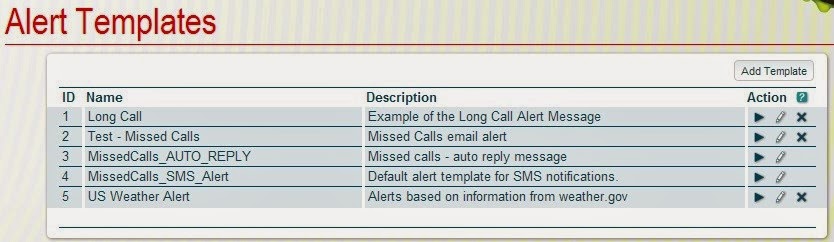
The List of Existing Alerts
Click the Add Template button.
Enter Name (required) and Description (optional but recommended).
Click the Add Action button.
Select Action Type: Text or SMS (the action that sends a text to IP phones and/or to mobile phones).
Fill out the fields From and Destination Group where From could be any text (e.g., 911 ALERT) and Destination group is the Security Group which you created.
Enter the desired alert text into the Text field. You can use proxy symbols in your message.
We used these three symbols:
[ANI] – calling number (extension that called the 911)
[TIME] – start time of the call
[MAC] – MAC address of the internal device
The list of all proxy symbols is available in the help menu (take your mouse over the question mark near the Text: field).
Similarly, add actions for email and Jabber messages. You can take inspiration from our example in the screenshot below. When finished, click the Submit button.
And here is our alert template:
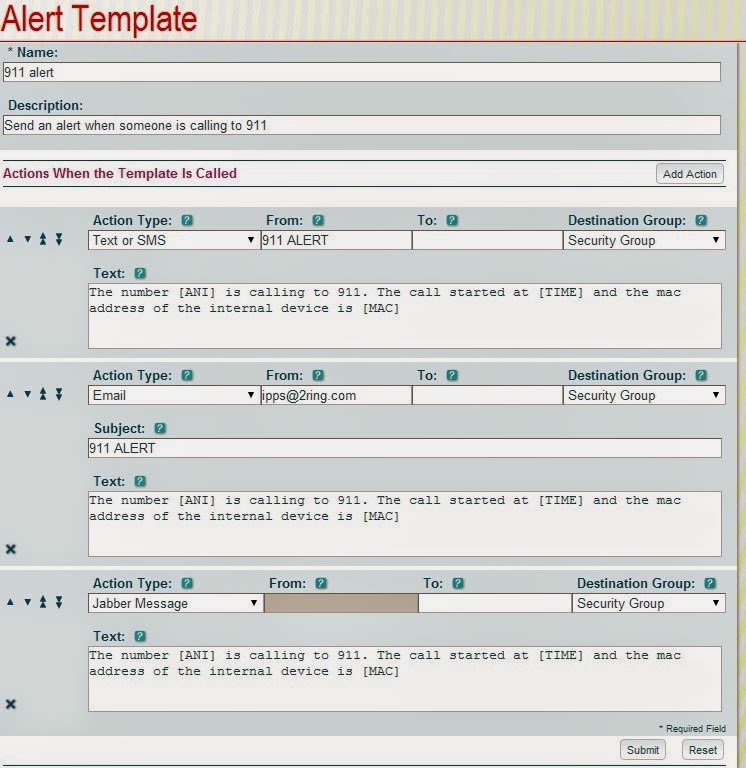
Alert Template – Detail
1.3 Creation of a Rule
The definition of an alert template will not do anything itself; it is just a template waiting to be used. The alert template needs to be triggered by an event. In our case, the event will be a call to 911 (in your tests, you can replace 911 with any external or internal number).
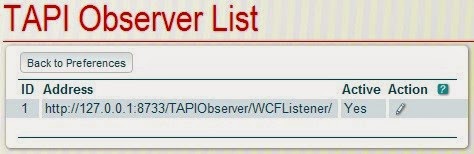
First, we need to configure a corresponding TAPI Observer rule. To do so, go to ADMINISTRATION –> Preferences –> Category: Caller Identification (CLID), Action: TAPI Observer List
1.3 Creation of a Rule The definition of an alert template will not do anything itself; it is just a template waiting to be used. The alert template needs to be triggered by an event. In our case, the event will be a call to 911 (in your tests, you can replace 911 with any external or internal number). First, we need to configure a corresponding TAPI Observer rule. To do so, go to ADMINISTRATION –> Preferences –> Category: Caller Identification (CLID), Action: TAPI Observer List
Note: We are assuming that you have a fully functional and active TAPI Observer (its configuration is out of the scope of this blog post).
Click the Pencil icon in the Action column (see above).
On the next page (TAPI Observer Configuration), check the checkbox for Warning when calling specified number (e.g. 911)
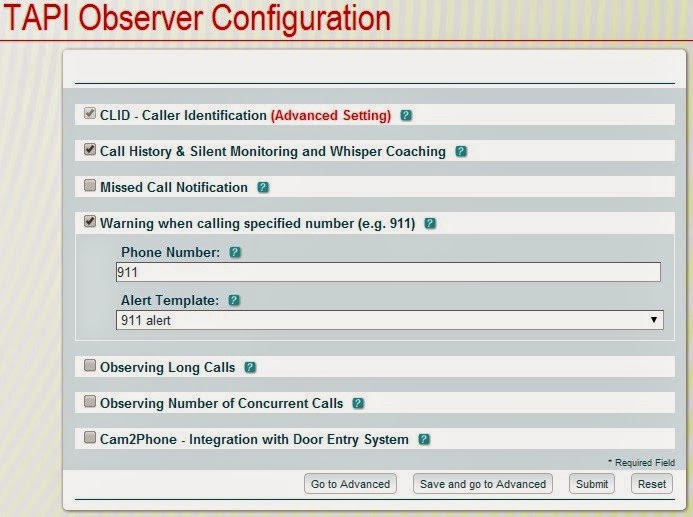
TAPI Observer Configuration Settings
Fill out the form:
Phone Number – enter 911
Alert Template – select the alert template you created
Finally click the Submit button to conclude the creation of a simple 911 alert.
Well done!
Conclusion
Check back later to read more HOW TO blogs in our 2Ring PHONE SERVICES series. If you have suggestions for topics, please let us know in the discussion below. And if you would like to play with this solution, a 60-day free trial of the Advanced Edition is available at www.2Ring.com/NewJuice.